Summary
In this lesson students will create their own tuner that they can use to tune instruments.
Age:
10-13 years
Lesson duration:
60 minutes
- Introduction: “What is a tuner?” (10 min)
- Structure of a tuner program design.
Number of Students
Up to 10.
Rationale
Students use tuners on a regular basis to tune acoustic instruments. However, students rarely get a chance to consider how tuners work. By working with students to show how a tuner works and guide them to building their own tuner, students take ownership over this important tool for music making.
Objectives
Students will familiarize themselves with the pitch block in the sensors palette. Students are also challenged to think ahead to design the tuner to work to certain specifications.
Lesson
Introduction
Begin by asking students if they are familiar with a tuner. Ask the group, “What is a tuner?” and “How do you think a tuner works?”
If a tuner is available, you might demonstrate its use by tuning an instrument like a guitar.
Whether or not a tuner is available, you may demonstrate the output of the pitch block inside a forever loop while doing glissandi up and down with your voice. Have students observe the relationship between the sounding pitches and the numbers printed on the screen.
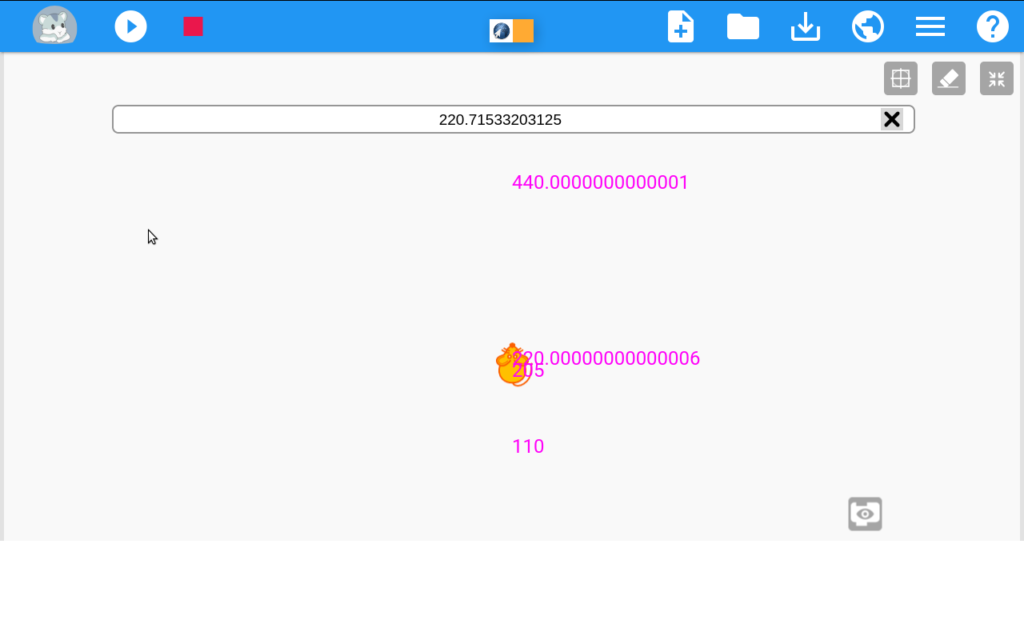
At this point it is usually wise to establish a reference for hertz, which is the output unit for pitch block. Since 440 Hz (A_4) is an easy number to conduct multiplication and division on, I would recommend using it as a reference. 220 Hz is the octave below (A_3); 110 is two octaves below; 880 is an octave above. I recommend playing these pitches on an instrument while pitch block is “listening” and printing hertz.
Part 1
A. The Pitch Block
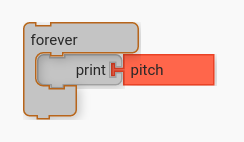
- Have students pull out a
pitchblock from the sensors palette. - Ask the students to use a
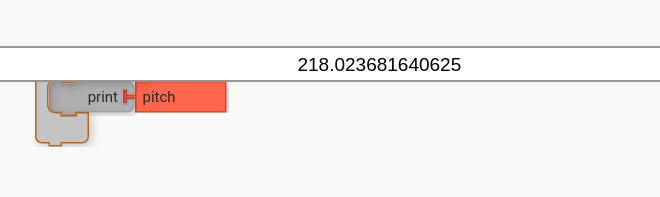
printblock andforeverblock in combination with the pitch block to print the output (in hertz). - Have them run the program while singing/playing different pitches.
Ask students how they might use this to work more like a standard tuner, how to make it more useful, and how to make it more fun.
B. Preparing the Structure
There are many different solutions to “how to make a tuner”. This section plan will guide you through a particular structure that I find useful. This being said, use your own creativity and discretion. The point is to challenge the students to plan out their design using action blocks and then fill in the code after they have sketched out the plan.
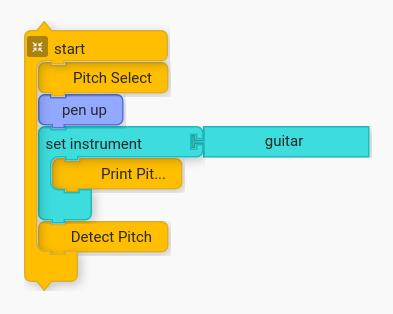
The design I landed on when creating this lesson is 1. Pitch Select, 2. Print Pitch, and 3. Detect Pitch.
Work with the students to create a design (or use the design above). Ask students to brainstorm how they will implement each section (e.g. “how will pitch select work?”)
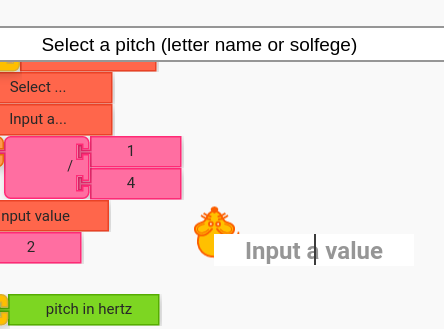
C. Implementing the Select Pitch Feature
Starting with the first feature, “Select a pitch”, ask the students to implement each feature.
Each feature will have its own challenges. What blocks are needed to allow a user to select pitch?
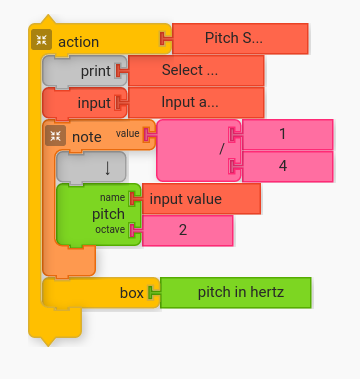
A pitch select feature will need to prompt the user to select the desired pitch. Input a Value and Input blocks do just this.
D. Implementing the Print Pitch Feature
The next challenge is to figure out how to display certain points on the screen so that the user can see how near they are to the chosen pitch. The following is one solution.

The above example is complex, but relatively robust. It uses while to repeat the process until the vertical space on the screen has been completely utilized. It uses box with the value taken from the previous action block, which is the pitch that the user selected in hertz.
The following is the part of the code that multiplies the base pitch by 2 to calculate octaves for the chosen pitch.
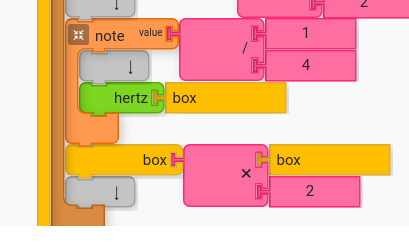
Lastly, this feature uses forward block and show to print the hertz value (instead of printing hertz). This is a workaround to the issue that printing “current hertz” prints the prior note’s value and not the current. There are other solutions to this as well. Use your imagination and ingenuity!
E. Implementing the Detect Pitch Feature
The last feature takes us back to what we started the lesson with. We print the pitch detected by the computer’s microphone and print the value to the screen.
Since the values for pitch in hertz have been printed on the screen over the y axis, it is nice to tie pitch to y axis as well to bring the avatar up and down as the detected pitch moves up and down in pitch.
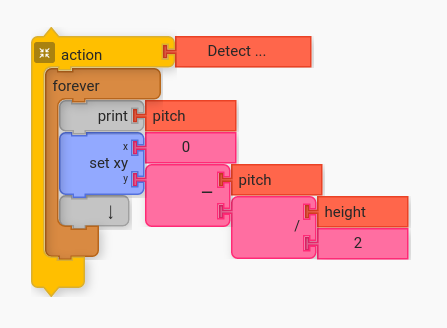
The x value remains static at zero.
The y value is pitch minus half of height. Otherwise only half of the vertical space on the screen would be utilized. For example, if the height of your screen is 400 pixels and the bottom of your screen is y value of -200, this will take hertz of 110 and place it at (110 minus 200 equals) -90, which is below center.
Open the completed program at https://musicblocks.sugarlabs.org/index.html?id=1594241542056158&run=True
F. Make it Unique
One of the biggest benefits to having the students create their own tuner is that they have ownership over the creative direction of how the tool works.
Ask students to remix their tuners to do fun, fanciful things as well as to improve the functionality.
Encourage students to share their projects to the planet and study, remix, and extend each other’s creations.
Performance/Critique
- Have students run their creation for the group.
- Have students explain how their creation works. Encourage students to give feedback and comments.
Materials
- Music Blocks software (Computer, up-to-date browser)
- Computer with a microphone (otherwise the pitch block will have no effect)
Assessments
- Observe participation
- Observe problem solving
- Do students structure their code?
- How do students solve the various challenges to implement their chosen features?